MECCHA CHAMELEON Hidden Spot Database
50 hiding spots, workshop maps, editorial ratings, and prop hunt guides — curated from TheGamer, IGN, and community references.
Popular Workshop Maps
Curated from Steam Workshop · Real preview images
Minecraft
Blocky village layout with familiar textures. Great for groups learning custom maps — trees, crafting tables, and wood tones offer varied hides.
Swimming pool!
Small painted-style pool map. Bright colors and hand-drawn walls — community favorite for chaotic funny rounds.
Meeting room
Modern office interior with reception, cafeteria, and dense office props. Strong silhouette-breaking furniture.
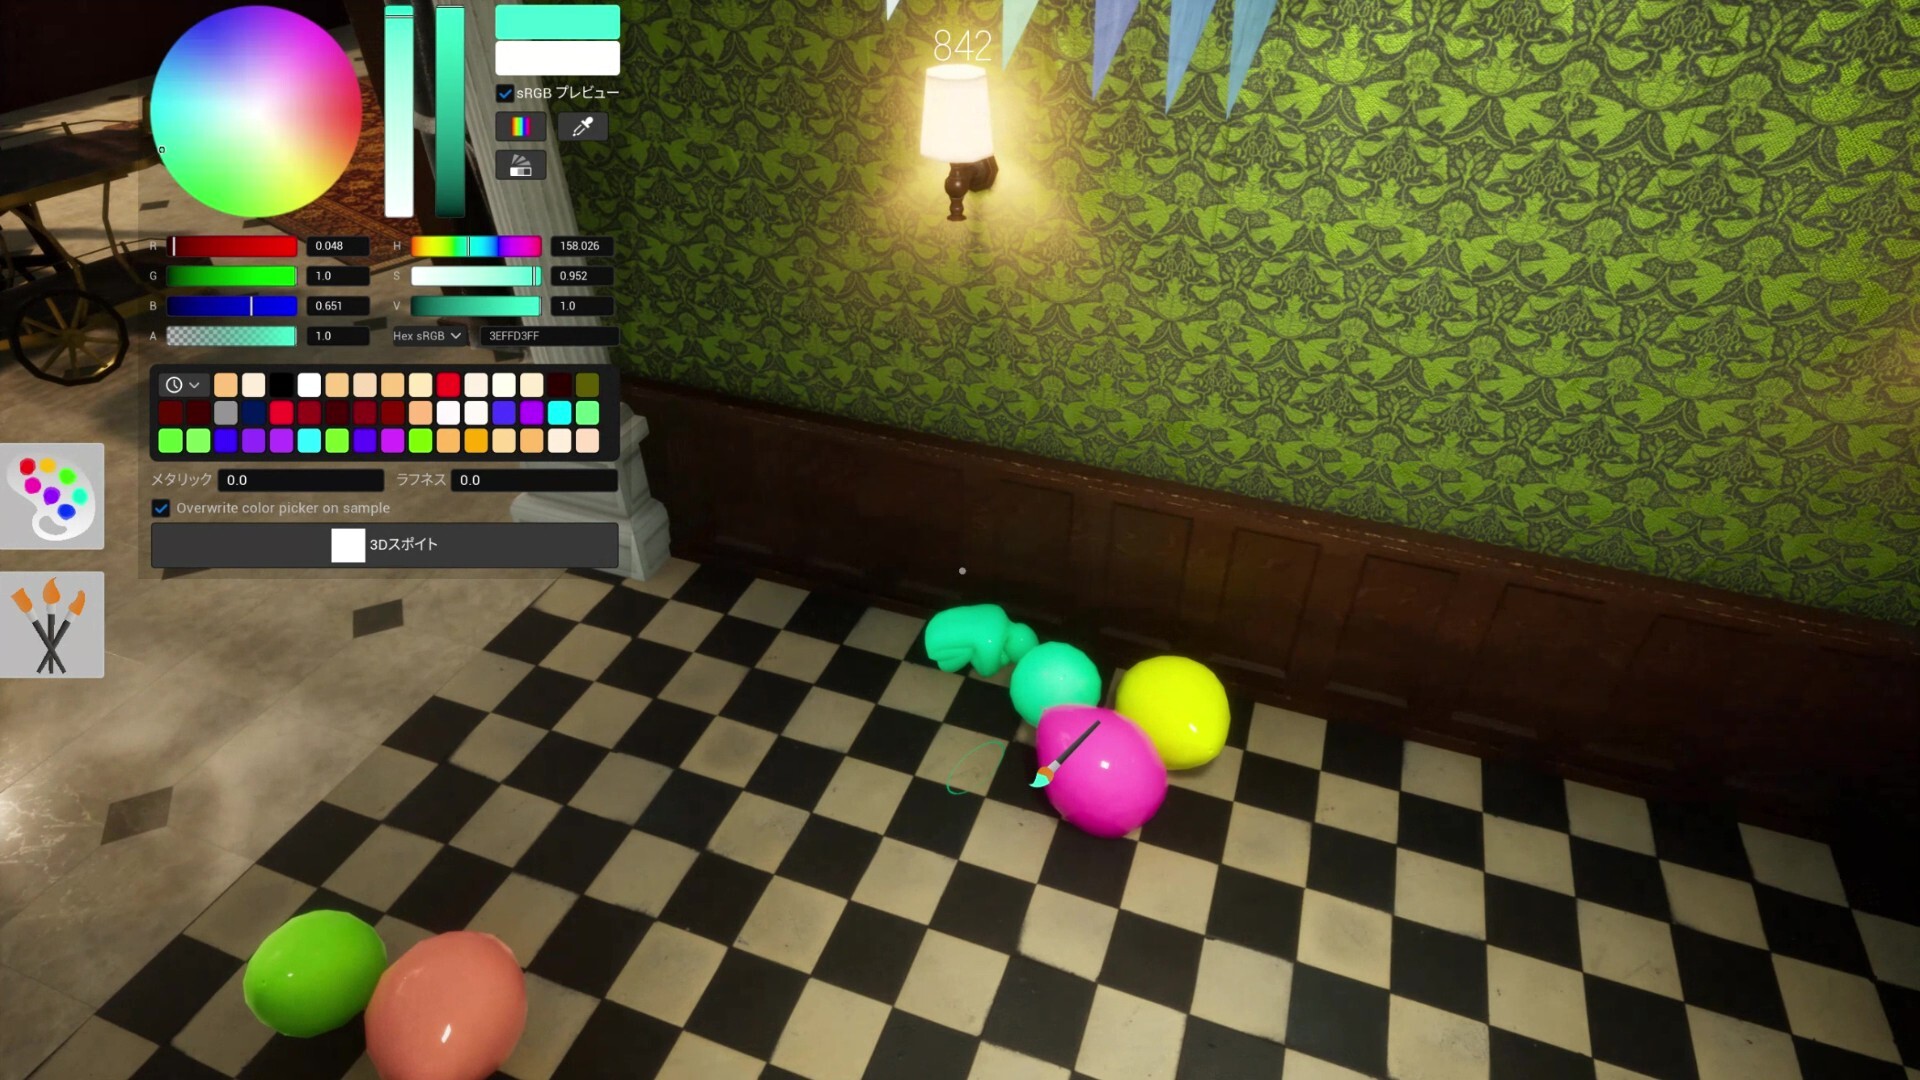
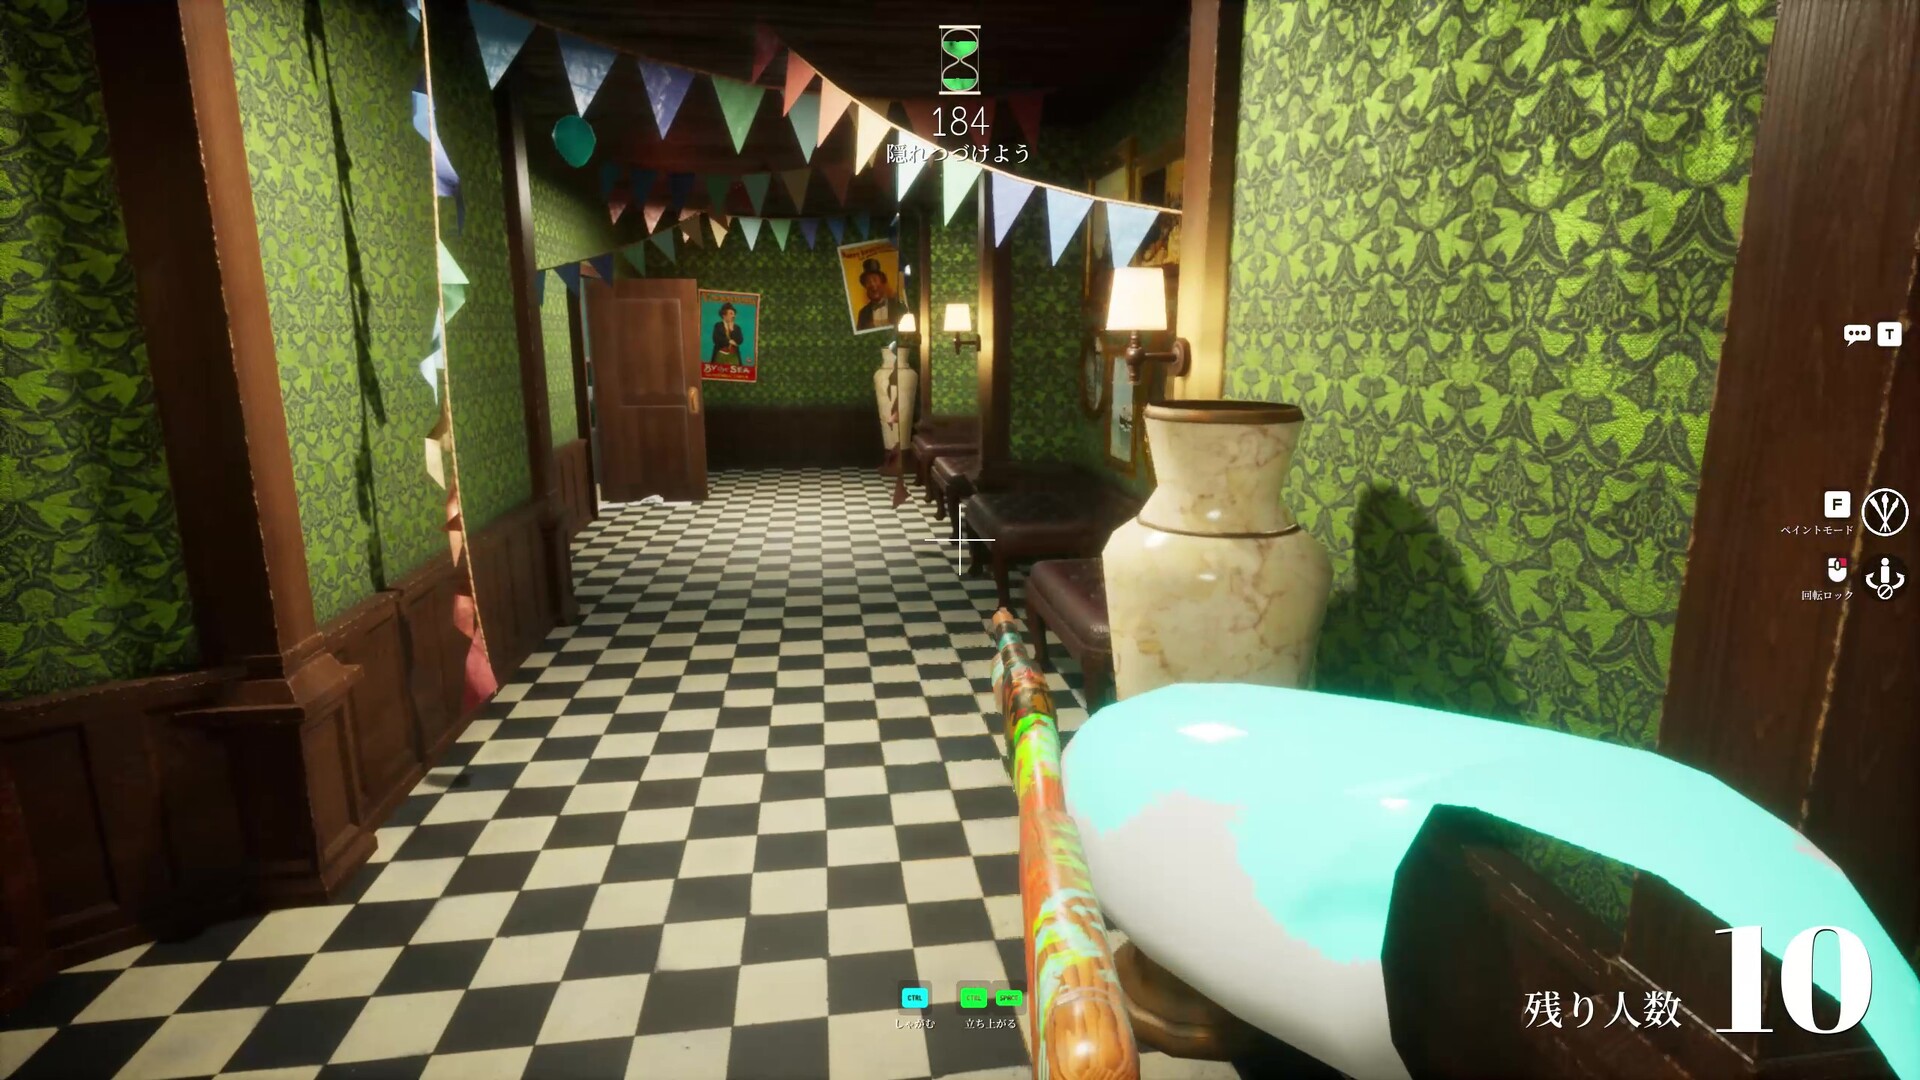
ART GALLERY
Museum with famous paintings and portraits on the walls. Paint yourself into the Mona Lisa or blend with the floor — unique body-paint mechanics.
CS2 Mirage
Counter-Strike Mirage layout with lanes, corners, and elevation. Familiar for FPS players — strong for organized seeker sweeps.
Minecraft House
Survival house with a large yard. Hide as a torch, flower, or grass block — inside and outside hides.
Top Hidden Spots
Best Meccha Chameleon hiding spots · Ranked by editorial rating
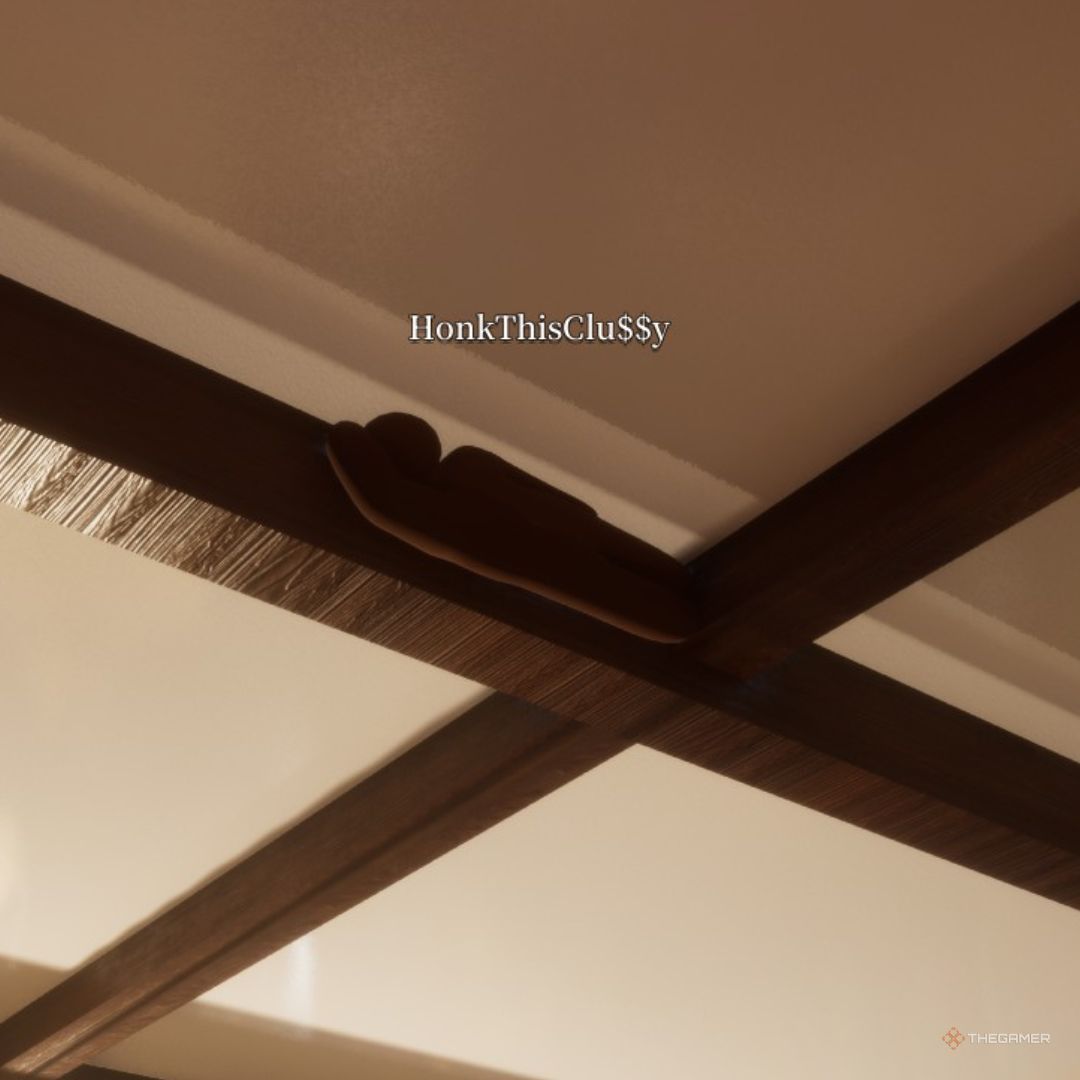
Dark Ceiling Pipe
Behind an overhead pipe in the darkest section. Community top-tier hide.
via TheGamer · TheGamer Community
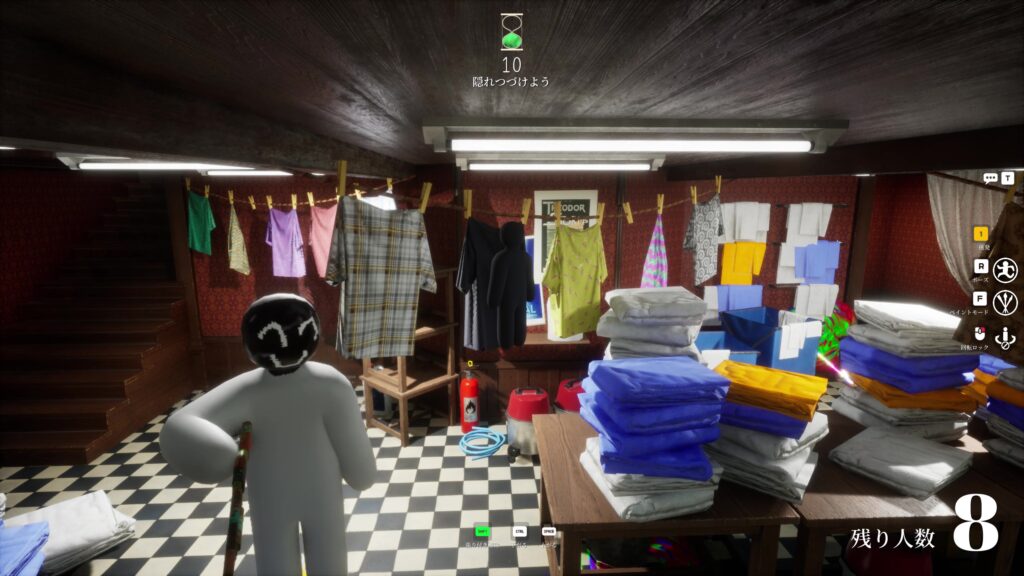
Shelf Back Row
Deepest rear shelf row. Top community survival rate on this map.
via meccha-chameleon.net · meccha-chameleon.net
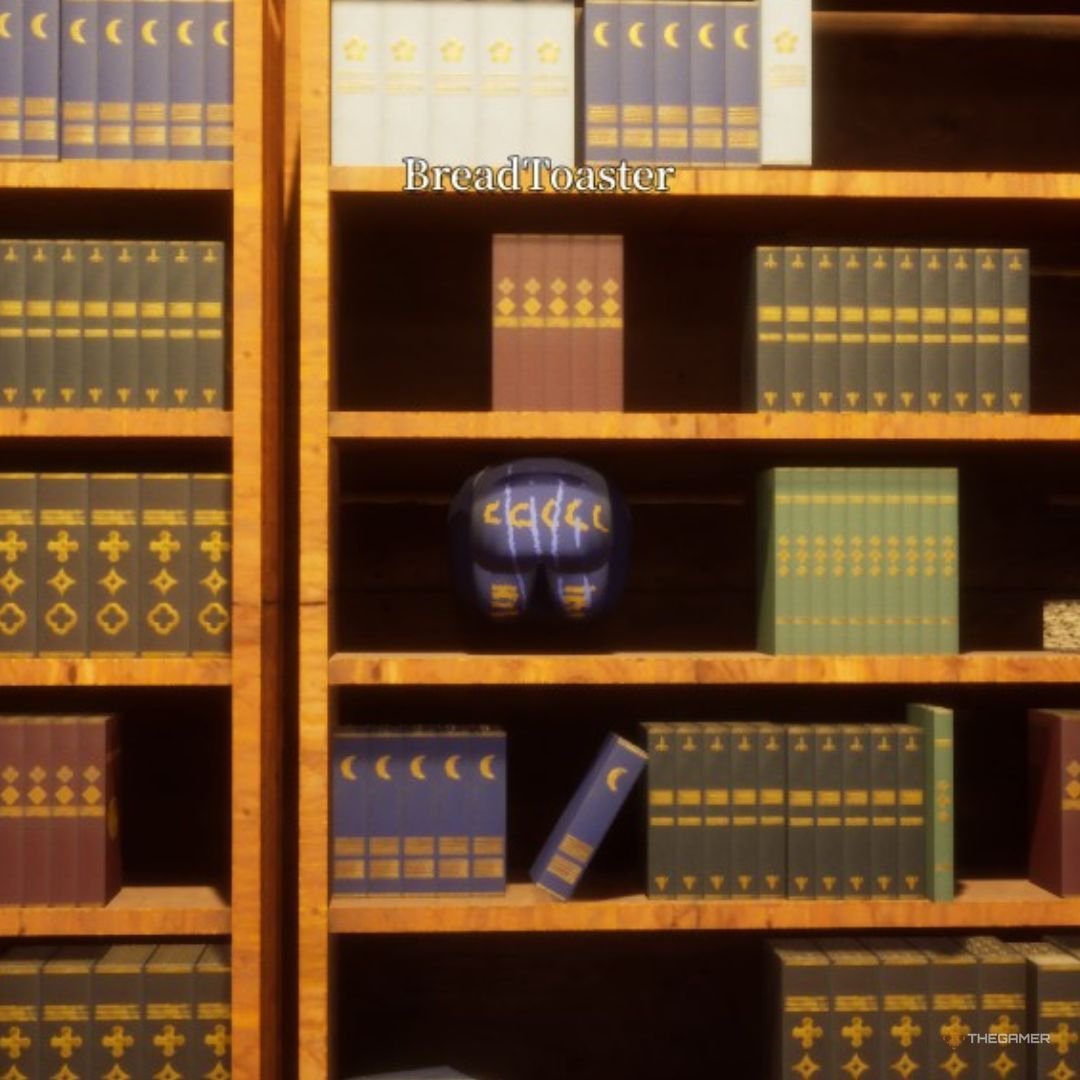
Library Shelf
Crouch between rear bookshelf rows disguised as book spines. One of the strongest verified Mansion spots.
via TheGamer · TheGamer Community
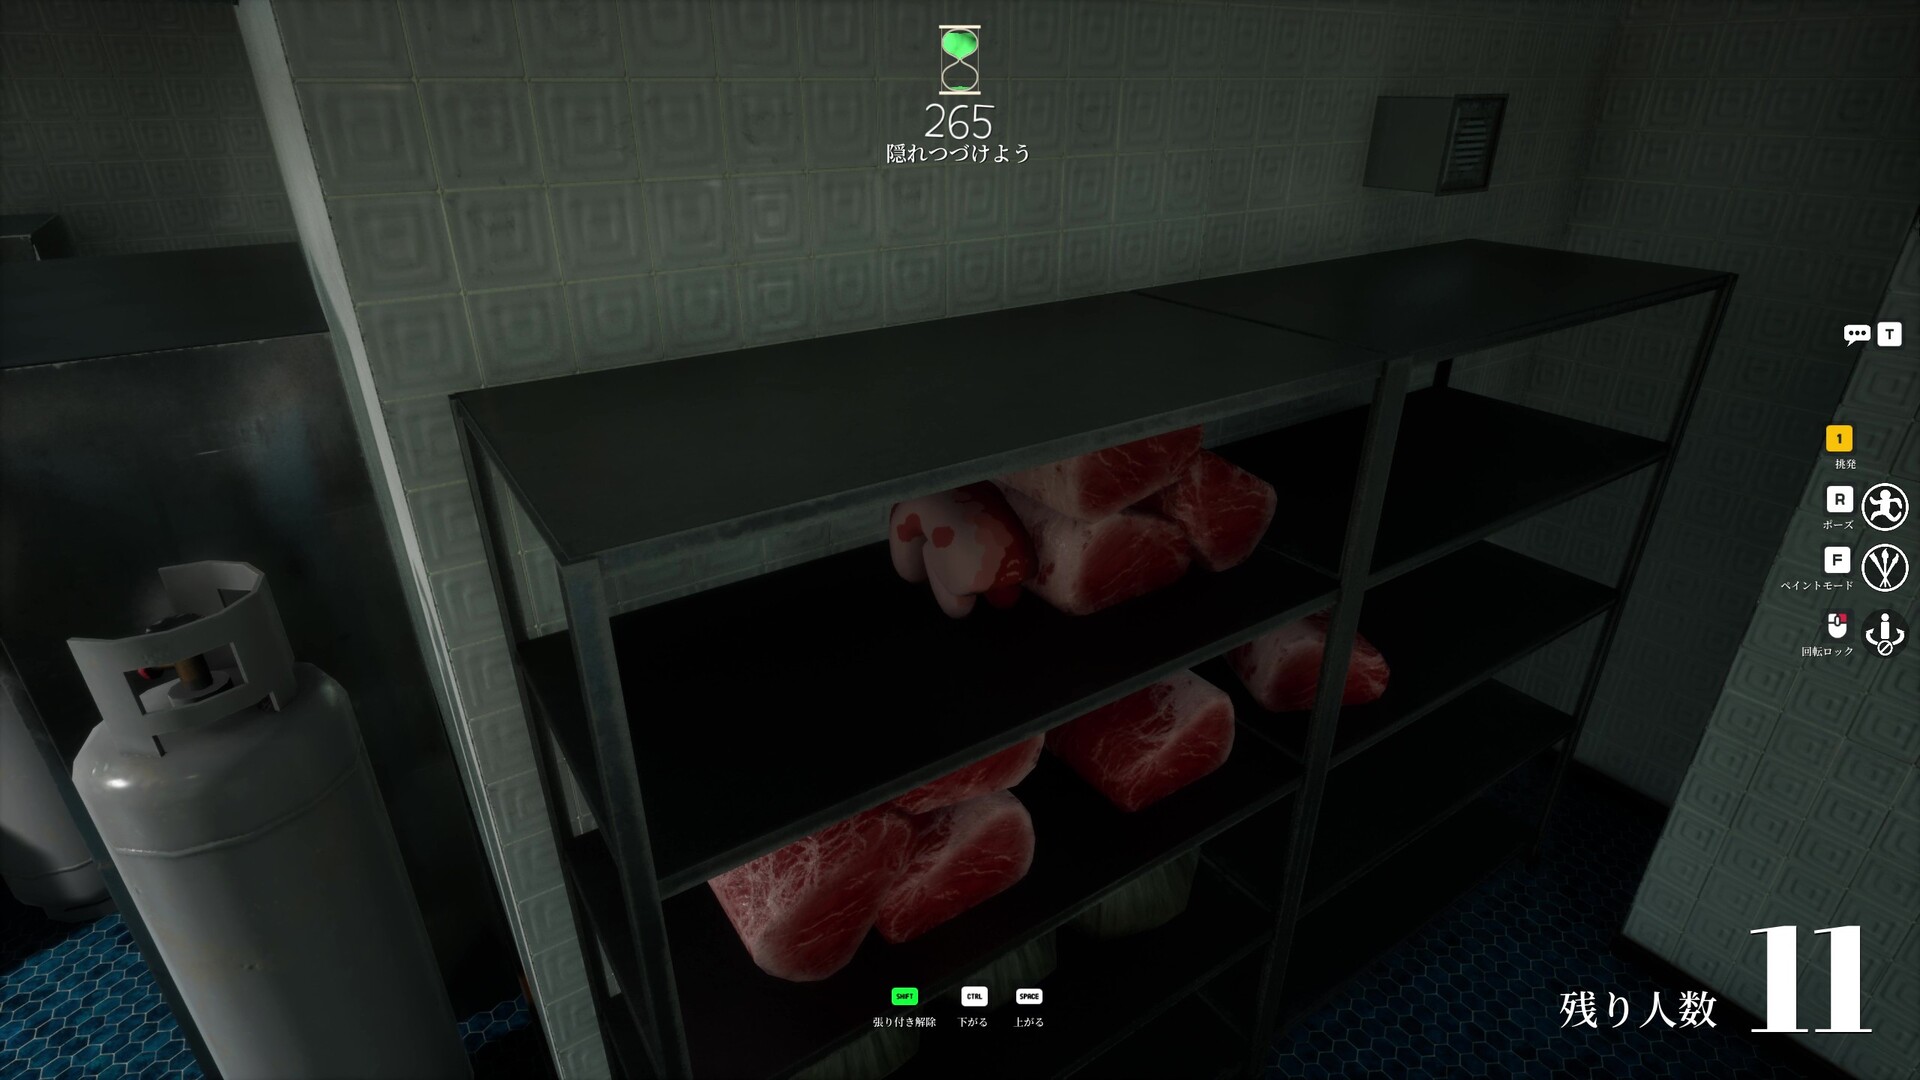
Meat Shelf Disguise
Meat shelf disguise with shelf shadow and prop repetition.
via meccha-chameleon.net · meccha-chameleon.net
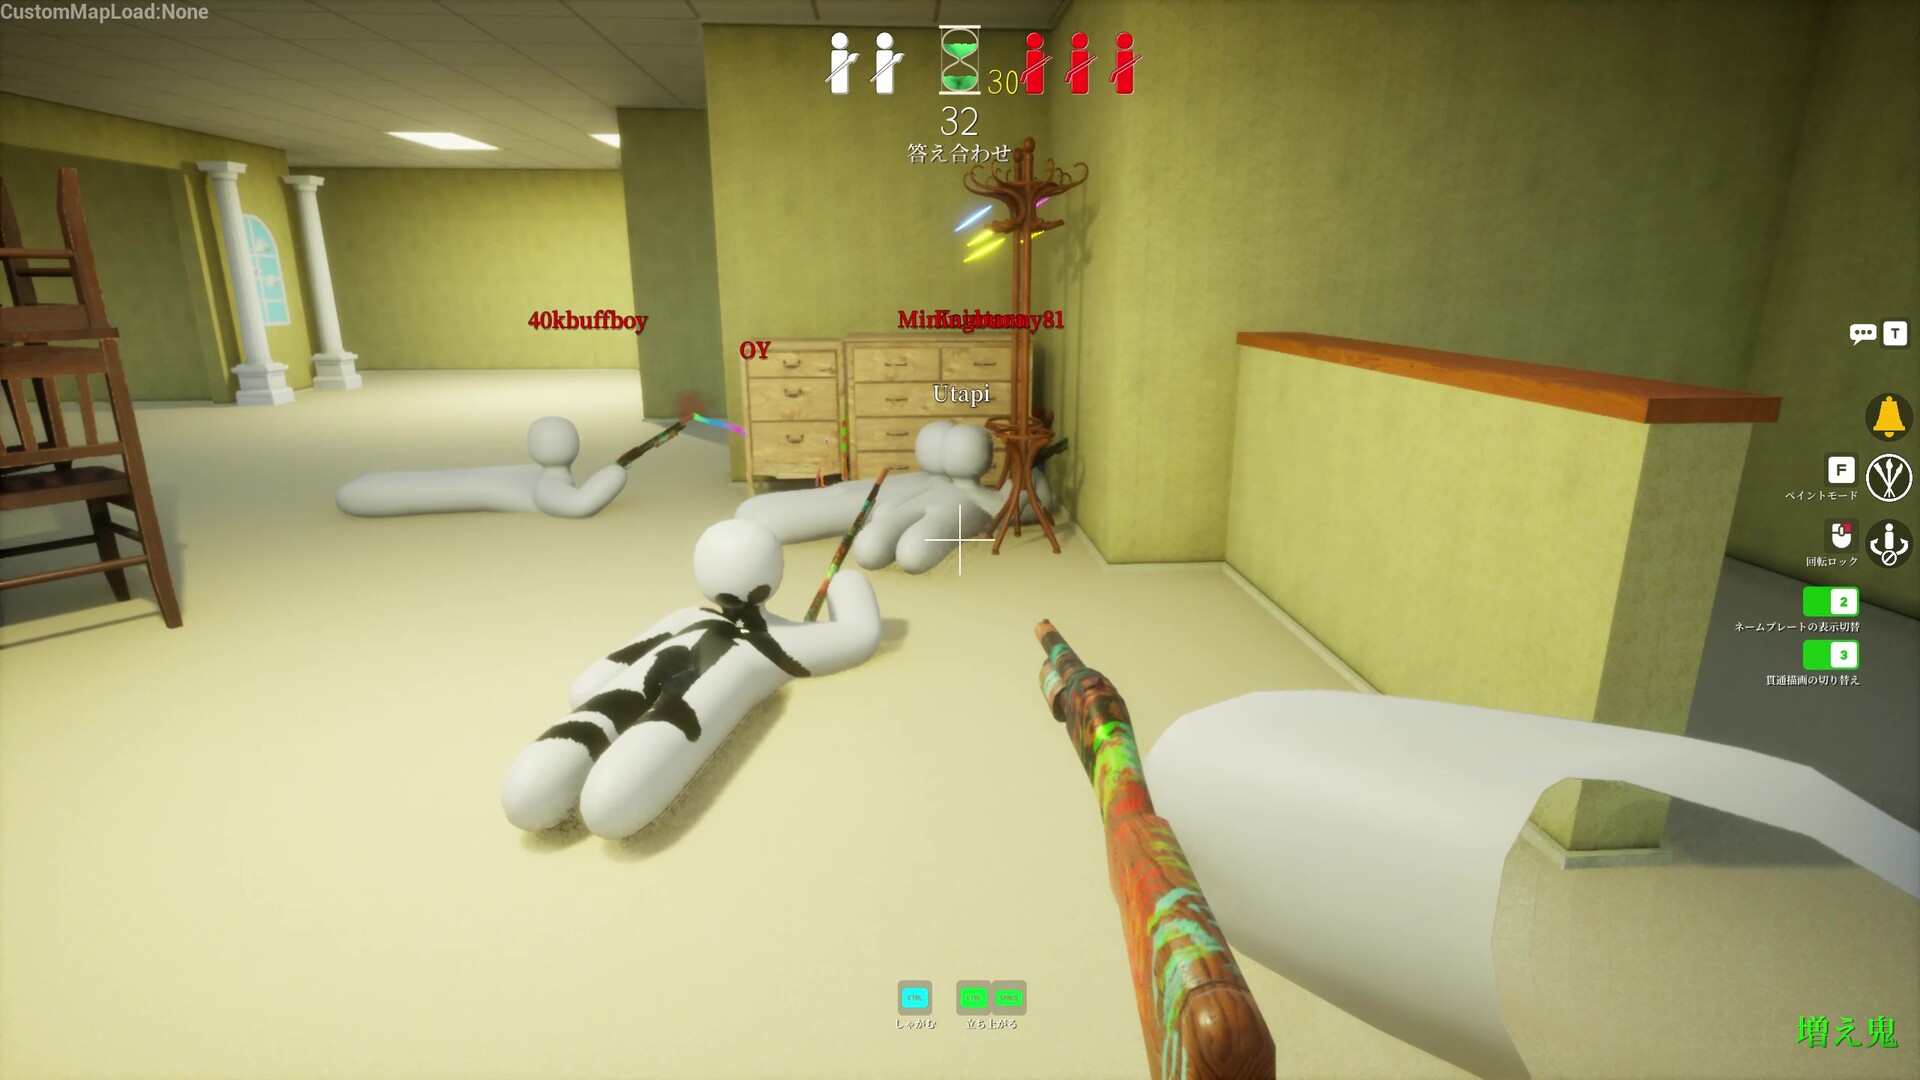
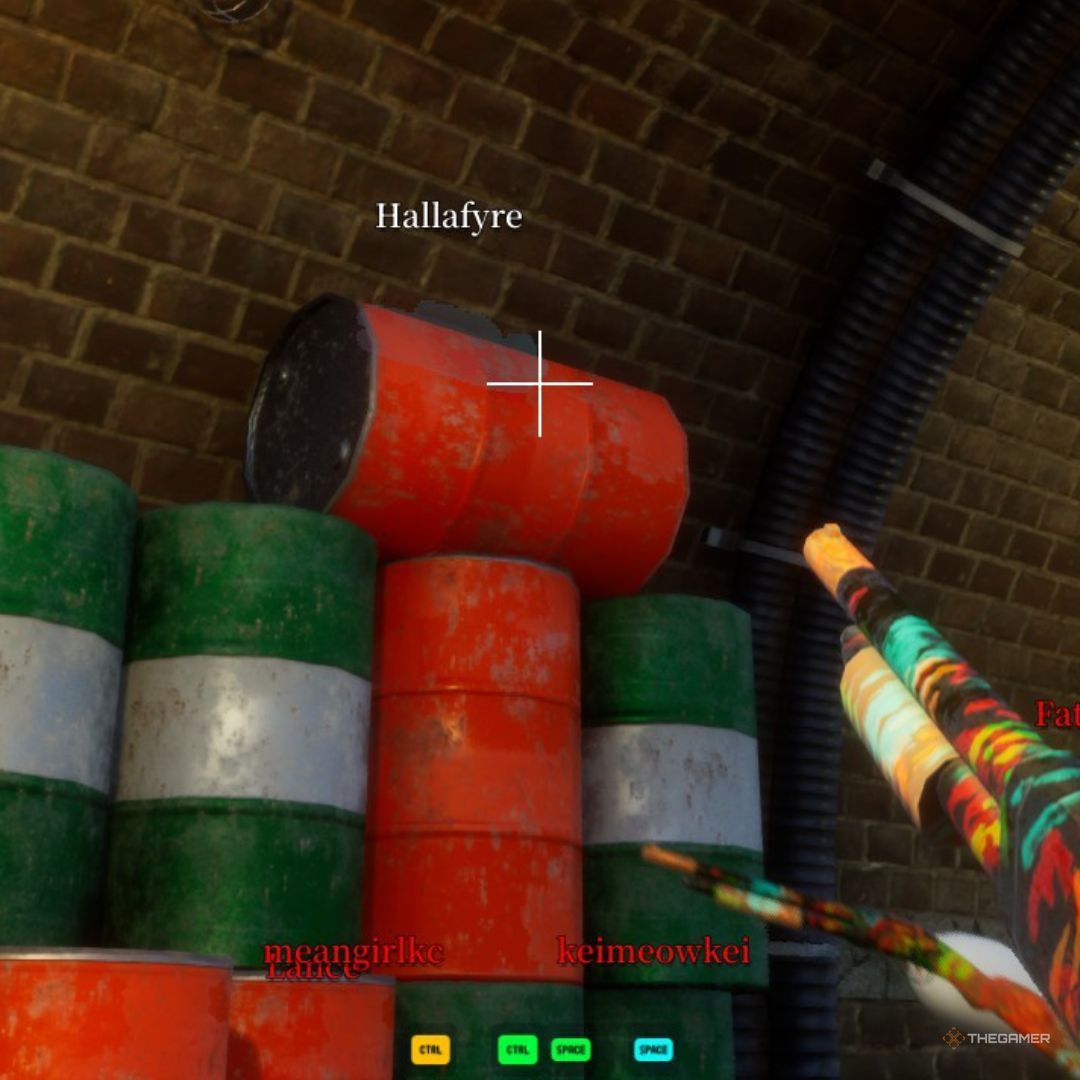
Oil Barrel Top
Lie flat on barrel top. Ground-level seekers walk past without looking down.
via TheGamer · TheGamer Community
Ceiling Pillar
Attach to a ceiling pillar in the main hall. Seekers often sweep floor-level first.
via TheGamer · TheGamer Community
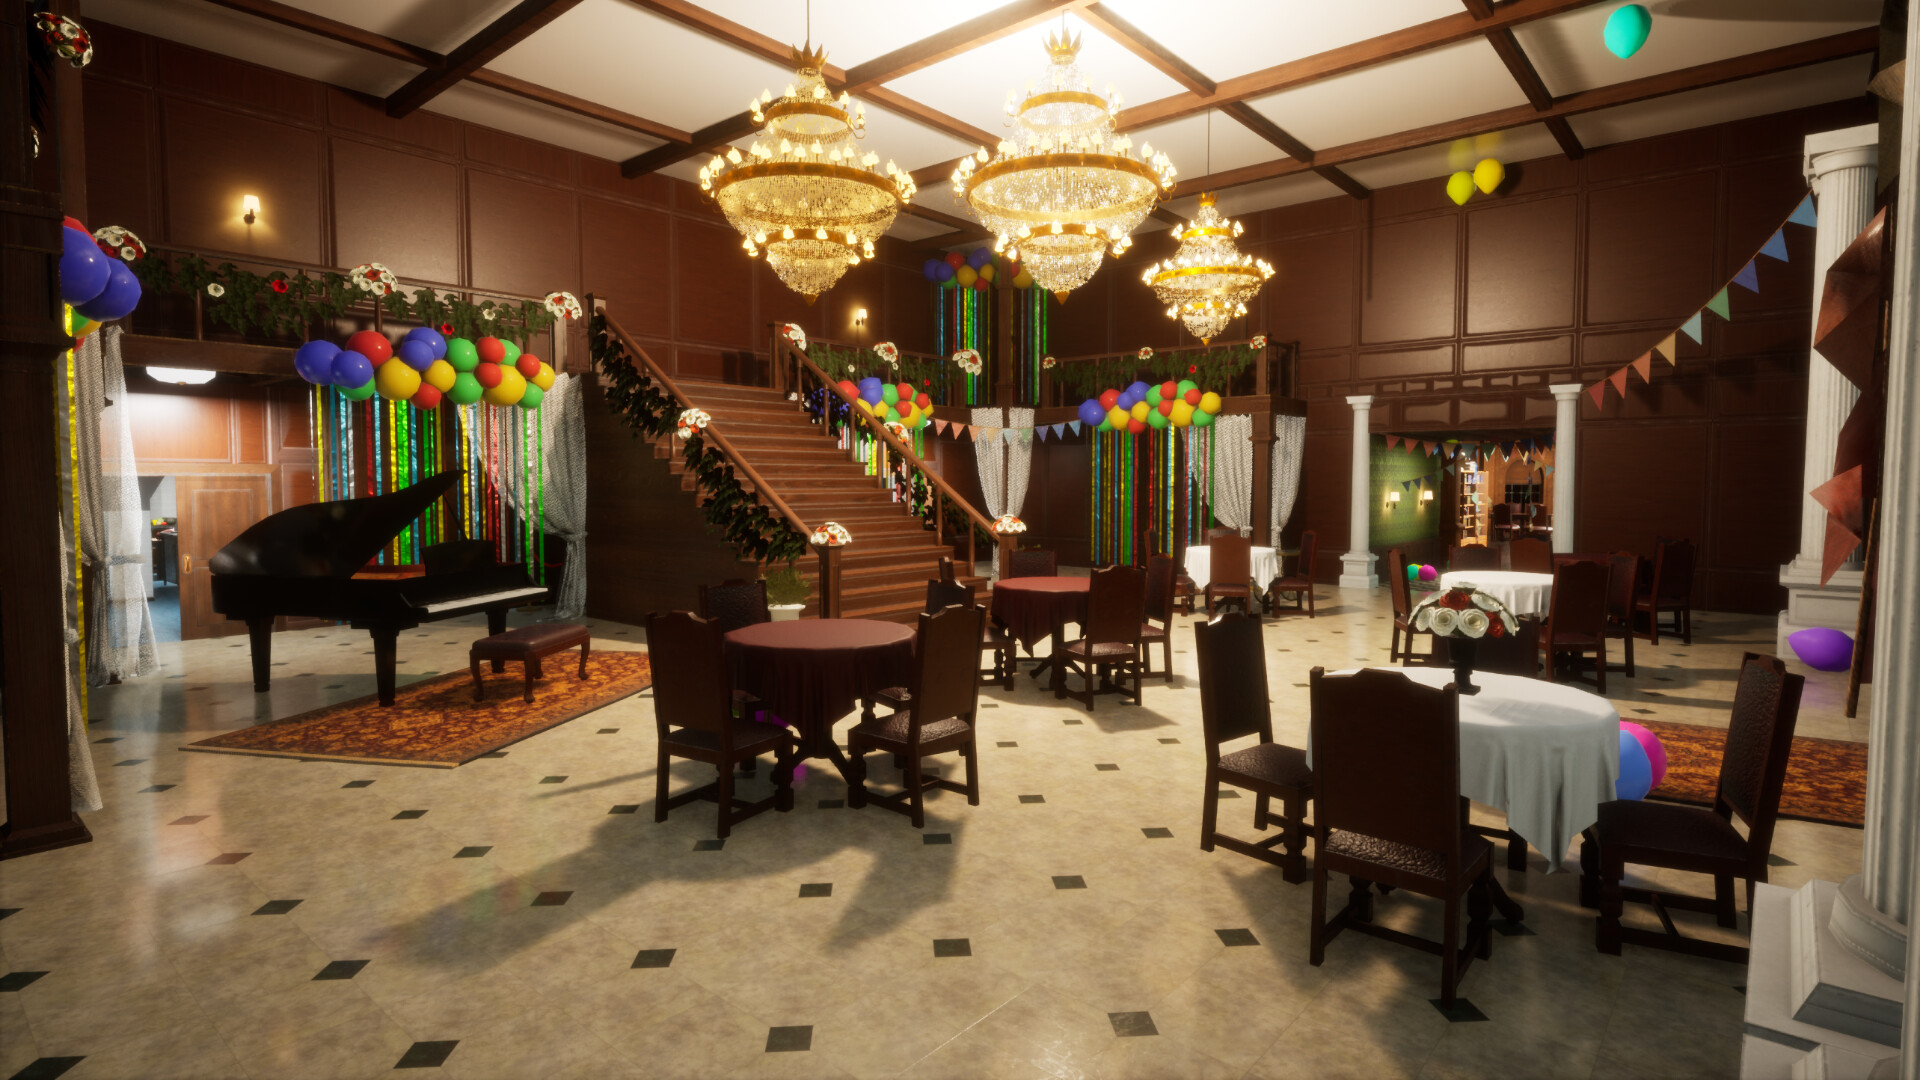
Ice Sculpture Back
Behind lobby ice sculpture. Ice blue and white fusion.
via Community · Community
Brick Beam Gap
Brick beam gap — horizontal striping hides your body.
via meccha-chameleon.net · meccha-chameleon.net
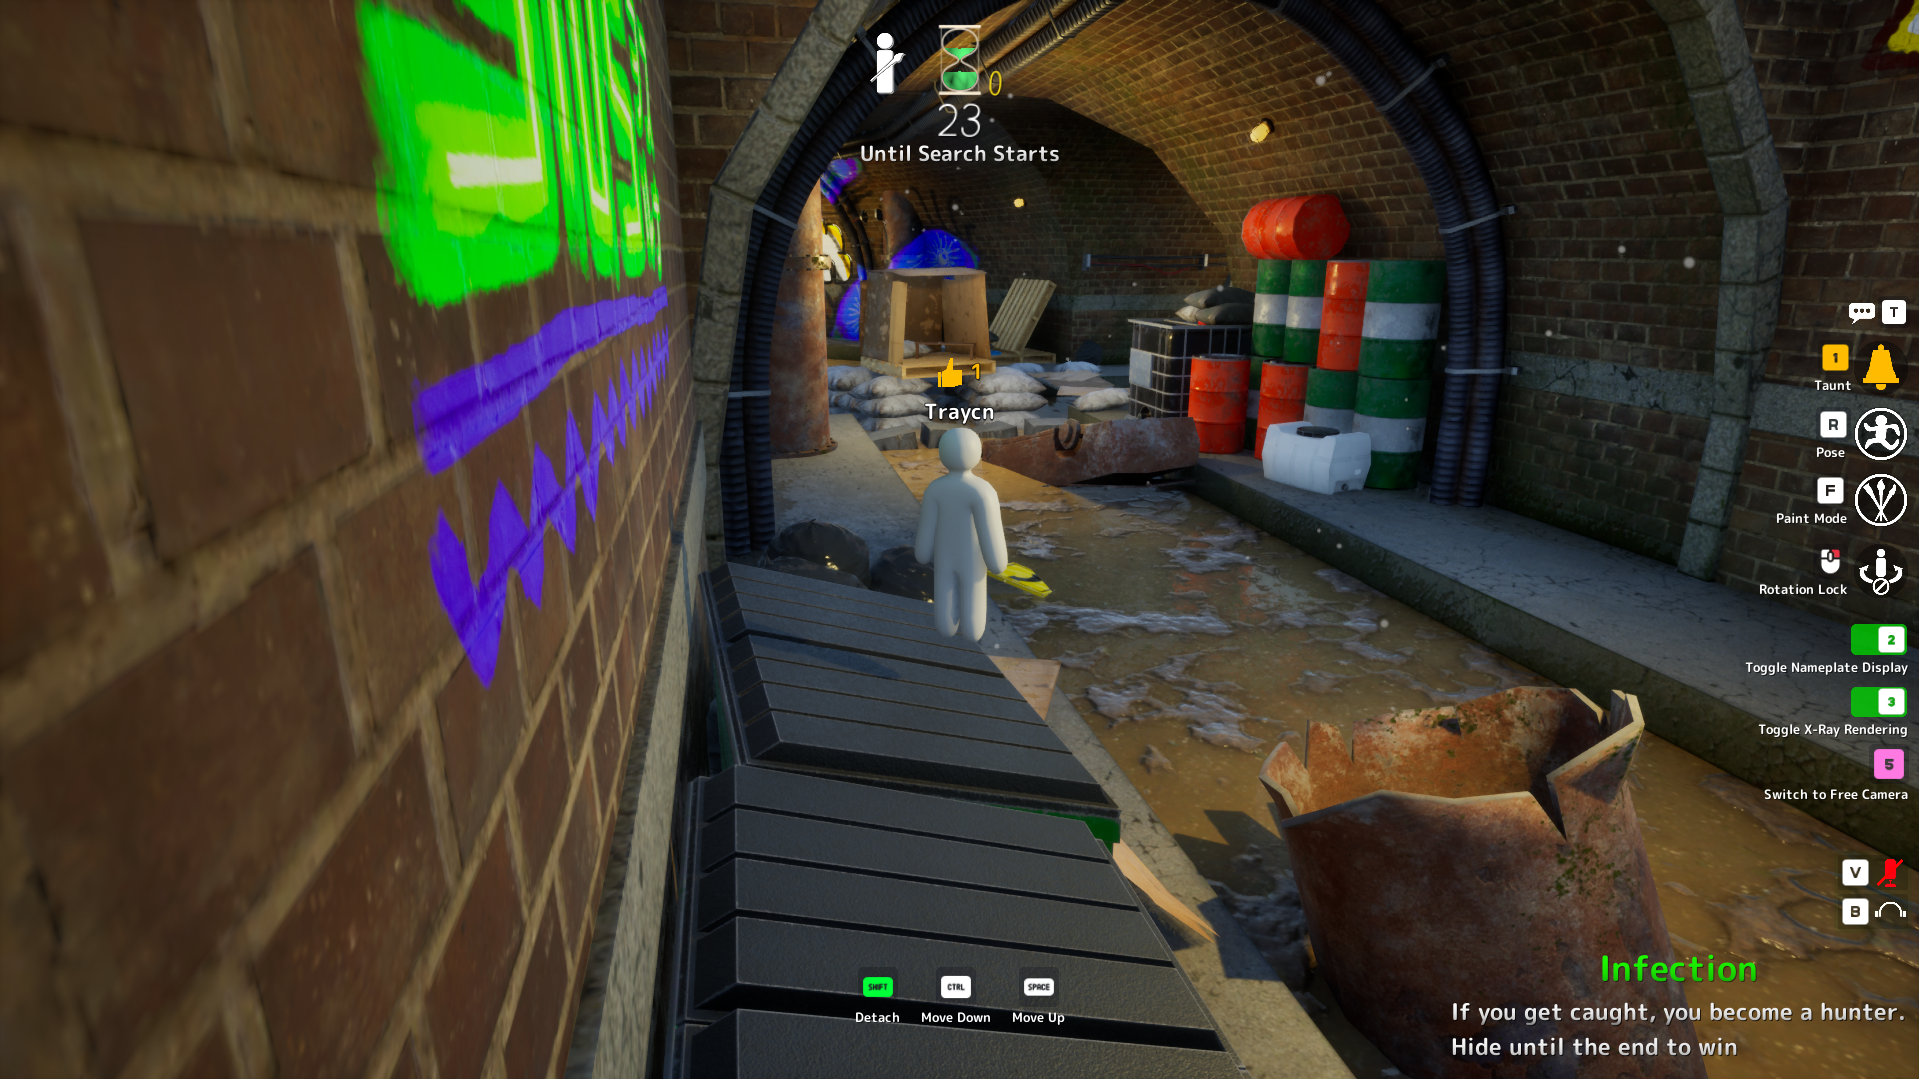
Pipe Overhang Junction
Central junction pipe overhang. Seekers pass directly underneath.
via mechachameleon.org · mechachameleon.org
Red Brick Alcove
Red brick wall alcove with rich color layers.
via TheGamer · TheGamer Community
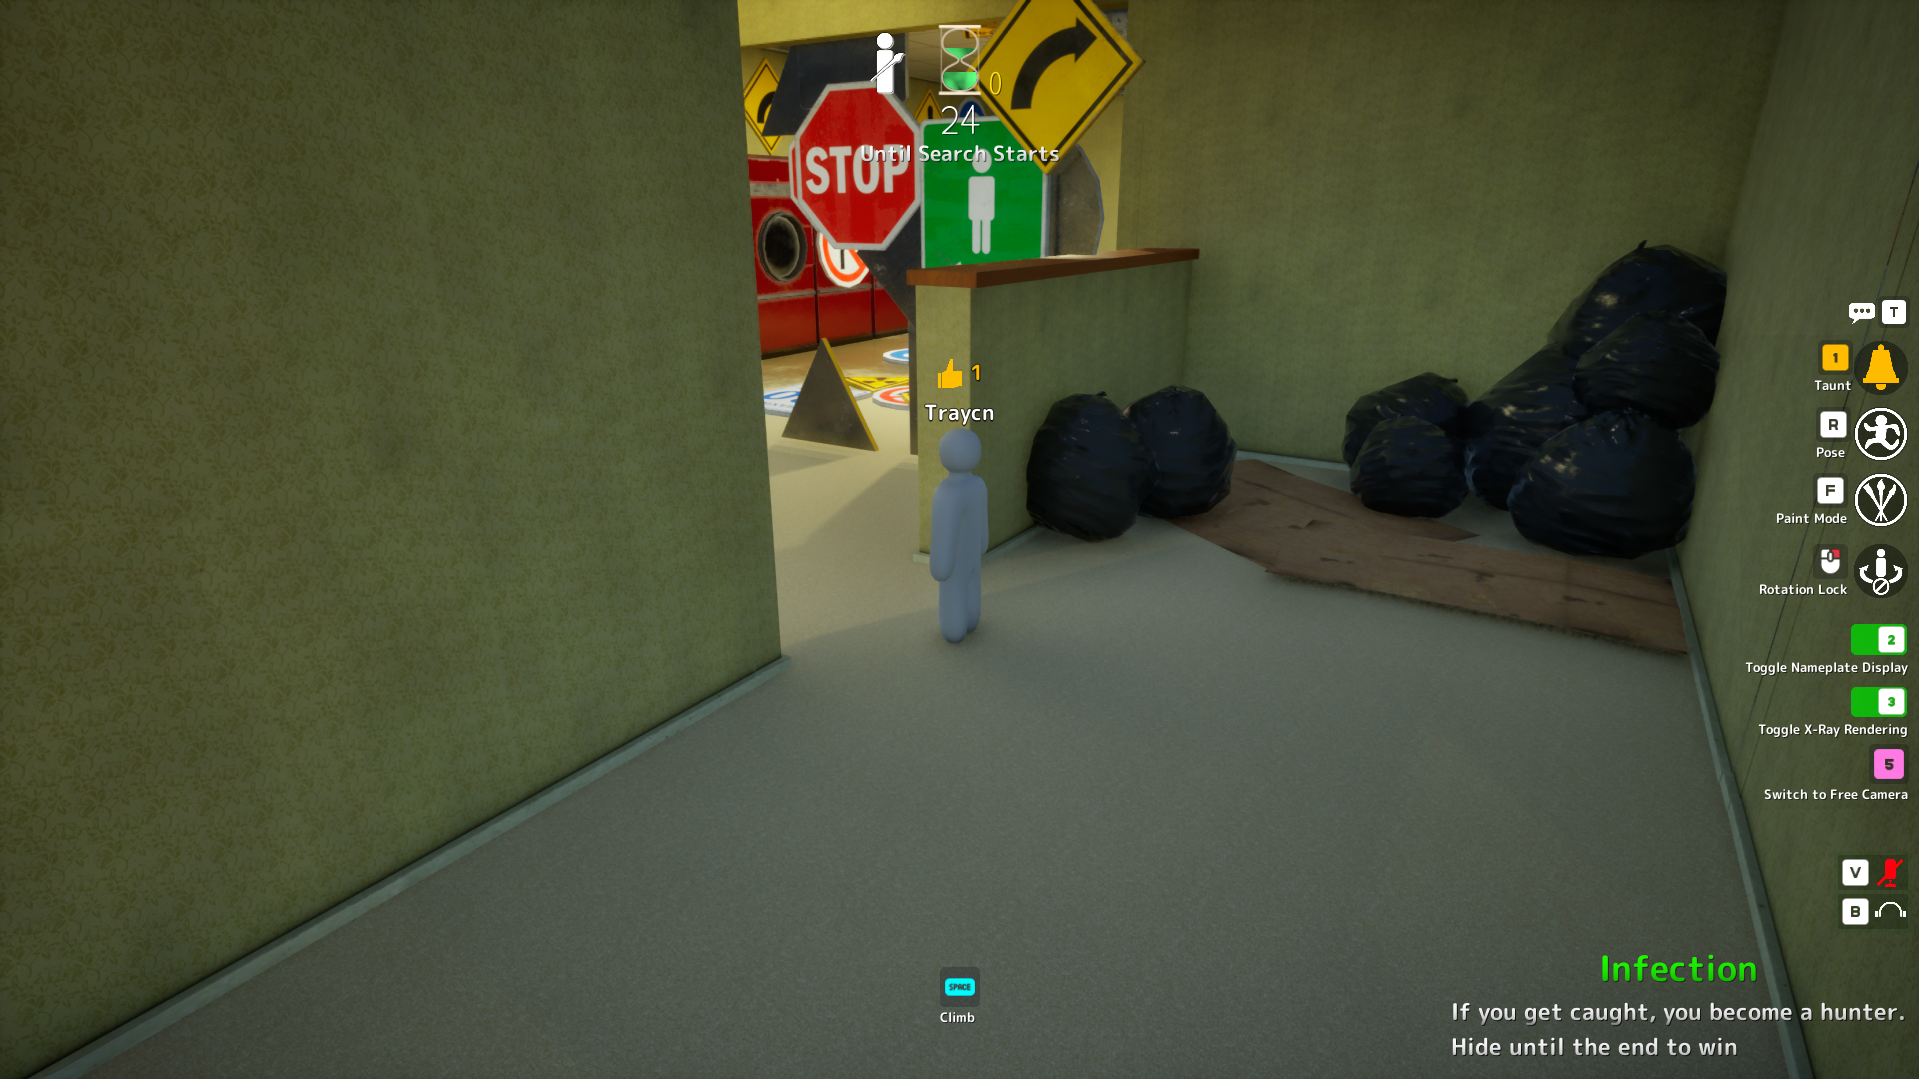
Yellow Wall Nook
Level 0 corner nook with yellow wallpaper. Stillness is everything.
via meccha-chameleon.wiki · Community

Tile Wall Grid
Tile wall grid — pose must respect tile lines.
via meccha-chameleon.net · meccha-chameleon.net
Latest Hidden Spots
Recently added to the database
Meat Shelf Disguise
Meat shelf disguise with shelf shadow and prop repetition.
via meccha-chameleon.net · meccha-chameleon.net

Gas Cylinder Corner
Gas cylinder corner — seekers tunnel on shelves and miss utilities.
via meccha-chameleon.net · meccha-chameleon.net
Tile Wall Grid
Tile wall grid — pose must respect tile lines.
via meccha-chameleon.net · meccha-chameleon.net
Under-Shelf Dark Zone
Dark zone under lower shelf after meat row inspection.
via meccha-chameleon.net · meccha-chameleon.net
Shelf Back Row
Deepest rear shelf row. Top community survival rate on this map.
via meccha-chameleon.net · meccha-chameleon.net
Brick Beam Gap
Brick beam gap — horizontal striping hides your body.
via meccha-chameleon.net · meccha-chameleon.net
Prop Hunt Guides
Meccha Chameleon hiding guides · Color tips · Map strategies
How To Hide Better In Meccha Chameleon
The complete beginner-to-intermediate guide: core mechanics, best colors, best maps, common mistakes, and advanced hiding techniques that actually win rounds.
Advanced Color Matching Guide
Hue, saturation, and value — plus map-specific palettes, gradient zones, dual-texture spots, and emergency recolor under seeker pressure.
Complete Seeker Guide
Systematic search methodology, audio tells, map-specific sweeps for all six official maps, team coordination, and endgame clock pressure.
Official Map Strategy Compendium
Rotation fundamentals, danger zone avoidance, and win conditions for Mansion, Sewer, Backrooms, Penguin Hotel, Cold Storage, and Brick Loft.
Player Guides & FAQ
New to MECCHA CHAMELEON? Expand any topic below for in-depth tips on hiding spots, beginner mechanics, and workshop maps. For download, controls, and multiplayer help, see Help & FAQ.
What Is MECCHA CHAMELEON?
MECCHA CHAMELEON (often misspelled Mecha Chameleon or Mecca Chameleon) is a multiplayer hide-and-seek game built around a single core idea: disappear into the environment before seekers find you. Unlike traditional shooters or battle royales, winning a round as a hider depends on color matching, pose discipline, and map knowledge — not reflexes or aim. You sample colors from walls, floors, and props with an eyedropper tool, lock your body into a pose, and hope experienced seekers walk past without noticing the wrong shadow, the wrong edge, or the human-shaped lump behind a bookshelf.
Each round splits into two phases. During the preparation phase, hiders scatter across the map and set up their hide before the hunt timer starts. This is when you choose your spot, sample your color, and commit to a pose — not when seekers are already sweeping the room. Once the hunt phase begins, movement breaks your color lock and creates audio tells. Seekers scan for value mismatches (light vs dark), unnatural silhouettes, and the subtle movement of players who panic-run when spotted. Rounds are short, lobbies are chaotic, and the gap between a 40% survival rate and a 90% survival rate is almost always positioning and preparation, not mechanical skill.
The game ships with six official maps — Mansion, Sewer, Backrooms, Penguin Hotel, Cold Storage, and Brick Loft — each with distinct color palettes, verticality, and seeker sightlines. Mansion is the beginner-friendly manor with large wood and plaster color blocks. Sewer introduces ceiling pipes and rust-green metal tones. Backrooms punishes lazy sampling with subtly shifting yellow wallpaper from room to room. Penguin Hotel mixes ice blues with plush ballroom interiors. Cold Storage demands cold steel grays against refrigerated shelving. Brick Loft splits between warm exposed brick and dangerous second-floor sightlines.
Beyond official maps, the Steam Workshop community has published hundreds of custom layouts — from Minecraft villages and CS2 Mirage recreations to horror backrooms variants and meme pool maps. Workshop maps vary wildly in color count, prop density, and competitive balance. A three-color workshop map favors hiders who sample once and freeze; an eight-color map punishes anyone who does not re-sample at every zone transition. Understanding how map design affects hide viability is as important as knowing individual spot locations.
Meccha Wiki exists because scattered YouTube clips and forum posts are not enough. Players need a searchable database of curated hiding spots with editorial ratings, color tips, common mistakes, and source attribution. Our database tracks 50 spots sourced from TheGamer, IGN, meccha-chameleon.net, and community references. Each entry includes screenshots, map context, and guide-based difficulty scores — test spots yourself in live lobbies after patches.
Whether you are a new player learning eyedropper mechanics on Mansion, an intermediate hider graduating to Sewer ceiling routes, or a veteran hunting workshop meta on custom maps, this site is your reference layer. Browse the hidden spot database, read map-specific guides, and explore curated workshop maps with real Steam preview images and subscription counts. The goal is simple: stop dying in the first thirty seconds and start surviving full rounds with spots the community has already tested.
Full beginner guide →Best Hiding Spots Guide
Not all hiding spots are created equal. A viral ceiling clip might fail in your lobby because seekers developed ceiling-check habits, the spot was patched, or you set up during hunt phase when every eye was already watching. The best hiding spots share three traits: they break your outline against environmental clutter, they sit outside default seeker sightlines, and they let you sample a color that matches local value (lightness) as well as hue. Editorial ratings on this site summarize guide consensus and difficulty — they are not live match statistics.
On Mansion, the highest-rated guide spots cluster around bookshelf rows, kitchen shelving, and bathroom tile corners. Library Shelf (editorial rating 87/100) works because rear bookshelf rows break your body rectangle against dozens of spine colors and shadow gradients. Seekers scanning at chest height see books, not the gap between rows. The key setup: crouch between rear rows, sample spine color plus shadow, use a flat pose, and never stick past the shelf lip. Ceiling Pillar (84/100) rewards players who climb during prep phase and sample plaster beige — but only if your lobby is not ceiling-aware. Kitchen Shelving and Bathroom Tile Corner follow the same principle: large color blocks, single approach vectors, and poses that merge your silhouette into existing geometry.
Sewer is where verticality becomes mandatory. Dark Ceiling Pipe holds a 91/100 editorial rating — among the strongest on the map — because overhead pipes sit above default camera height and dark gray sampling disappears against rust-green metal in low light. Oil Barrel Top (85/100) works for players who can sample barrel metal and stay completely still on top; seekers often scan past barrel tops because they read as flat environmental props. The Sewer meta punishes floor-level habits: if you are still hiding at ground level after ten hours on Mansion, Sewer will expose you immediately. Learn ceiling routes before you queue Sewer in serious lobbies.
Backrooms is psychological warfare. Repetitive yellow halls confuse seekers but also confuse hiders who forget to re-sample when crossing doorways — wallpaper yellow shifts subtly room to room. The best Backrooms spots use chair stacks, office corners, and wall-clip positions that break sightlines in identical-looking rooms. Avoid long fluorescent corridors; they are rotation paths, not homes. Every verified Backrooms spot in our database notes the exact color hex range and whether the position still works after recent patches.
Cold Storage and Penguin Hotel are expert-tier official maps. Shelf Back Row on Cold Storage (91/100) demands steel blue sampling and a crouch at the bottom rear of the deepest shelf row. Seekers hate checking every gap between frozen inventory — that reluctance is your advantage. Penguin Hotel splits between ice sculpture zones that reward prop mimic and ballroom centers that seekers favor because open sightlines make movement tells obvious.
When evaluating any spot — official or workshop — run this checklist before you commit during prep phase. First: can you sample a color that matches both hue and value at your exact position? A perfect green on a shadowed pipe still pops because seekers notice brightness before undertone. Second: does the spot break your outline? Flat walls are bad; shelves, pipes, and furniture stacks are good. Third: how many approach vectors can seekers use? Single-entrance corners beat open junctions. Fourth: is this a rotation path? Loading bays, ballroom centers, and Backrooms corridors see constant foot traffic — cross them, do not camp them.
Editorial ratings summarize guide difficulty and consensus — they are not aggregated player votes. A spot at 85/100 is treated as highly reliable in source material; a spot at 60/100 may work in casual lobbies but fail when one experienced seeker knows the counter. Use our sort filters — Top Rated, Newest, Featured — to find spots that match your skill level and map preference. Filter by category for Best Hiding Spots, Funniest Spots, Impossible Spots, or Community Picks depending on whether you want to win or create content.
The fastest way to improve is not random exploration. Pick one map, open its dedicated map page, and work through the three highest-rated spots until you survive a full round on each. Record your deaths: if you die to the same room three times, your color — not your spot — is usually the problem. Re-sample at the exact pixel you touch. Go darker when in doubt. Light colors in shadow look like stickers; dark colors in shadow look like shadow. Pair database spots with our map strategy guides for Mansion, Sewer, Backrooms, and Cold Storage to understand why each position works, not just where it is.
Browse hiding spots →Beginner Tips for Mecha Chameleon
Every experienced hider was once the first player found every round. The difference between a beginner who dies in thirty seconds and an intermediate who survives full rounds is not talent — it is understanding three core systems before worrying about advanced spots or workshop meta. Master color sampling, pose locking, and seeker camera height on Mansion first. Everything else in this game flows from those three mechanics.
Color sampling is your primary survival tool. You eyedrop a surface and your body adopts that color. Perfect match makes you nearly invisible at a glance. Close match survives casual scans. Bad match glows like a warning sign. The most common beginner mistake is sampling the wall three feet away instead of the exact pixel your body touches. On gradient walls, corners and baseboards are darker — sample there if your pose is low. On dual-color zones like bathroom tile plus grout, sample both and choose the pose that hides your outline in the busier texture. When under pressure, prioritize matching value (dark vs light) over perfect hue. A slightly green-gray on a gray pipe beats a perfect green on a shadowed pipe.
Pose locking is the second system. You are not a free-moving character while hiding — you commit to a pose (flat against wall, crouch, object mimic) and breaking that pose costs precious seconds plus creates movement tells. Set your pose during prep phase, not after seekers spawn. If you are still moving when the hunt timer hits zero, you are already losing. Practice switching sample plus lock in under 1.5 seconds on Mansion bathroom tiles; that muscle memory transfers to every map in the game.
Seeker camera height is the third system most beginners ignore. Most players scan at chest and eye level. Spots above default sightlines — ceiling pipes, pillar tops, shelf backs — survive longer because seekers develop floor-level habits. This is why Sewer ceiling routes dominate high-level play and why Library Shelf works better than standing flat against a library wall. Think in layers: break your outline with environmental clutter, break sightlines with corners, and break height expectations when the lobby meta is floor-level.
Map choice matters for learning speed. Mansion is the correct first map. Rooms are readable, color blocks are large, and community spots like Library Shelf and Kitchen Shelving forgive small sampling mistakes. Spend your first ten hours here before touching Sewer or Backrooms. Sewer is your first skill check: verticality matters and open junctions kill careless crossers. Play Sewer when you can consistently survive one full Mansion round without moving at the wrong time. Backrooms adds psychological pressure with repetitive halls — learn chair stacks and office corners, avoid long corridors. Cold Storage and Brick Loft are expert territory; queue them when official easy and medium maps feel comfortable.
Stop making these beginner mistakes today. Mistake one: running in open space when spotted. The correct panic response is sample nearest wall, flat pose, freeze two seconds — most seekers overshoot. Mistake two: camping obvious props without matching prop color. Hiding inside a statue only works if you sampled statue stone, not the wall behind you. Mistake three: moving while seekers face you. Wait for back-turn or audio distraction. Mistake four: choosing pretty spots over functional spots. The viral ceiling clip fails if you set up during hunt phase. Mistake five: ignoring sound. Footsteps on tile, ladder climbs, and object mimic animations have audio cues — experienced seekers listen as much as they look.
Positioning fundamentals separate 60% survival from 85% survival. Move along walls, not through room centers — wall movement keeps one surface for emergency sampling. When choosing between two spots, pick the one with a single approach vector so you hear seekers coming. When rotating between rooms, re-sample at every doorway; Backrooms wallpaper yellow shifts subtly room to room. Never fight in bad zones: ballroom centers, loading bays, and fluorescent corridors are rotation paths. Cross them quickly or die.
Build a simple practice routine instead of grinding random queues. Week one: Mansion only, survive a full round without rotating more than twice. Week two: add Sewer ceiling routes, aim for one ceiling hide per round. Week three: Backrooms chair zones, zero deaths in fluorescent corridors. Week four: pick one workshop map and learn three curated spots from our database. Each session, test one new spot and note whether it worked for you — that is how you validate guide entries after patches.
Color matching guide →Workshop Maps Explained
Steam Workshop extends Mecha Chameleon far beyond its six official maps. Community creators publish custom layouts ranging from competitive CS2 recreations and Minecraft villages to horror backrooms variants, office interiors, and chaotic meme maps. Workshop content keeps the game fresh — but it also introduces variables official maps never have: inconsistent color counts, untested sightlines, meme props that break competitive balance, and preview images that look nothing like in-game lighting. Understanding workshop map design helps you pick lobbies where your hide skills transfer instead of fighting the map itself.
Every workshop map has a color count — the number of distinct surface colors seekers must distinguish. Low color count maps (three to four colors) favor hiders who sample once and freeze; seekers struggle to spot value mismatches when the entire map shares a narrow palette. High color count maps (seven to eight colors) punish lazy sampling — you must re-sample at every zone transition or your undertone pops against a neighboring shade. Before you queue a workshop map, check its color count on our workshop pages. Medium maps (five to six colors) like Minecraft and Meeting Room offer the best balance for learning custom layouts without extreme seeker or hider advantage.
Workshop maps fall into rough categories that predict lobby behavior. Competitive maps — CS2 Mirage, Meeting Room, Minecraft — attract organized seeker sweeps and players who treat rounds seriously. Funny maps — Swimming Pool, meme layouts — favor chaos, content creation, and spots that would never survive a disciplined scan. Horror maps add atmospheric pressure and tight corridors that amplify sound tells. New This Week maps rotate constantly; early subscribers often discover broken spots before creators patch them. Our workshop directory curates maps with real Steam preview images, subscription data, and tags so you know what you are joining before you load in.
Popular community picks serve different purposes. Minecraft offers blocky village textures with trees, crafting tables, and wood tones — familiar zones for groups learning custom maps together. CS2 Mirage brings Counter-Strike lane structure with corners and elevation that FPS players already understand. Meeting Room delivers modern office interiors with reception areas, cafeterias, and dense furniture for silhouette breaking. Swimming Pool is a bright, hand-drawn chaos map for funny rounds rather than competitive grinding. Each map page on Meccha Wiki links directly to its Steam Workshop listing so you can subscribe with one click.
Workshop meta differs from official map meta in one critical way: spots are not pre-verified by years of community testing. A shelf gap that works on Mansion does not translate to a custom office prop arrangement. When exploring new workshop maps, treat our hidden spot database as a starting curriculum for official maps, then apply the same evaluation checklist — outline breaking, sightline control, color match quality, single approach vectors — to discover positions yourself. Record what works and what dies; the workshop ecosystem changes weekly as creators update layouts and players find new exploits.
Use workshop maps strategically in your improvement path. Start with medium color count competitive maps after you can survive official Mansion and Sewer consistently. Avoid pure meme maps until your fundamentals are solid — funny rounds teach content creation, not survival discipline. When a workshop map clicks for your group, subscribe and learn three positions per zone before moving to the next map. Our workshop meta guide covers color-count strategy, seeker sweep patterns on custom layouts, and how to read workshop tags before you queue. Browse the full workshop directory for curated picks updated from live Steam Workshop data.
Workshop map directory →